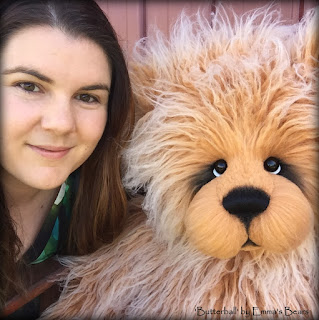
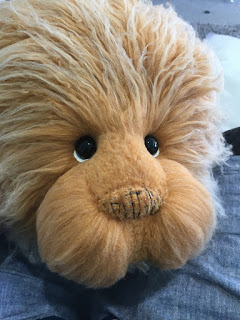
This big bear is Butterball. Our newest kit-example bear made in some of our newest faux fur. We decided to use our 33" JUMBO pattern for this big guy - and when you factor in the size of this design combined with the crazy-fluffiness of this fur, the resulting bear is HUGE!!!
Butterball himself is available for adoption on our website, but there is only one of him (he's one of a kind as made by us here at Emma's Bears). We do have kits available if you'd like to have a go at making your own Butterball bear though. We'd just caution that this is not a project to take on if you've never made a bear before!
If you're up for a challenge though, we have taken the time to document the creating process with photos, and will share some of the steps here (the Butterball kits will also include these extra instructions as an extra printed document).
The fur we've used to create Butterball is a very long, very dense Mongolian-style fake fur with a frosted, wispy and tangled tip. This gives the fur a gorgeous textured look, but will mean you'll need to spend a little time trimming back your seams before sewing, and running your fingers through the pile to help separate it a bit. This will just make your life a bit easier when sewing, turning and assembling.
We followed the process as outlined in the original Jumbo pattern, and trimmed back the paw pads using the same faux fur so the colour was an exact match. The trick with this step and this fur is to leave about 10mm of fur when you trim. If you cut it back too far you'll see the white threads of the knitted backing, and this isn't ideal. But as you can see in these two photos, the fur has a really cool textured effect when trimmed back to a short, but not too short length. The natural stretch of the knit-backing allows for really good 3D toes when you go to sculpt the paw pads too (process also fully explained as part of the Jumbo pattern).
Because this fur has quite a bit of natural stretch, we found it best not too stuff the bear too firmly. We used a nice springy polyfill which allowed us to fill up the cavity space inside each of the bear parts (limbs, feet, head etc), without having to really pack it in and make the bear rock-hard. We used a little bit of bead shot enclosed in small fabric bags to give him a touch more weight (I wouldn't recommend putting any bead weighting in loose with this fur as the knit backing is a little more open then usual and could allow small beads to work their way through). You really don't need the bead shot though, as it'll take about 2-3kg of polyfill to fill him up, so he'll already be weighty!
When it came time to bring his face to life we trimming back the bridge of the nose as per usual, but combed out the cheek-fur before beginning the trimming process. This allows you to get smoother cheeks as you're not trying to neatly trim back curly-fur. It also helps fuzz out the individual fibres and gives the cheeks a much fuller look.
Once the cheeks are combined, we trim down the 'chin' seam to separate each side of the face, and trim down the side of the cheek from the 'eye-socket' position to the underside of the chin. This gives you your two rough shaped cheeks. You could actually leave the trimming at this, and not take it any further if you'd prefer to save time. Your bear will have a beard-like look which is still pretty cool.
But if you do want to take the time, just carefully trim the longer parts of the cheek fur away, shaping as you go (ie trim more away around the eye socket area, but leave the centre of the cheeks longer). It takes a while, but eventually you'll have a face looking back at you like this below:
Then it's time to set those sweet eyes. We use quite large 18mm black glass eyes for this bear with just a hint of eye-whites underneath (we use a white ultrasuede fabric to achieve this, but any non-fray white fabric will do the trick). And because the head should still be quite malleable due to the softer stuffing, you should be able to sink those eyes a fair way down into the eye sockets. This will help give the muzzle a bit of shape too.
Then it'll be time to embroider a nose. This kit includes black DMC thread, but if you have another colour in mind it's totally up to you. We use the first few stitches as a shaping guide - ie. you're kind of sculpting the nose at the same time as embroidering it. Pull the stitches in firmly as you take them though, or you'll get them puckering up through the outer layers as you finish off the nose.
You won't need to add shading to your bear if you don't want to, he's pretty impressive even without it. But if you do just follow the outline of the paws you pulled earlier, and just add a hint behind his eyes and around his nose.
And then you'll have a finished Butterball bear staring back at you!!


Dear Emma
ReplyDeleteI love the details from the photos. I like yours patterns and kits. I got some new earlier this month.
I would like to see more blocks of details of the processing....
Many greetings from Germany
Dagmar
Blogs... German correction made it to blocks 😂
Delete